Easy Brimless Beanie: Free Crochet Pattern for Beginners
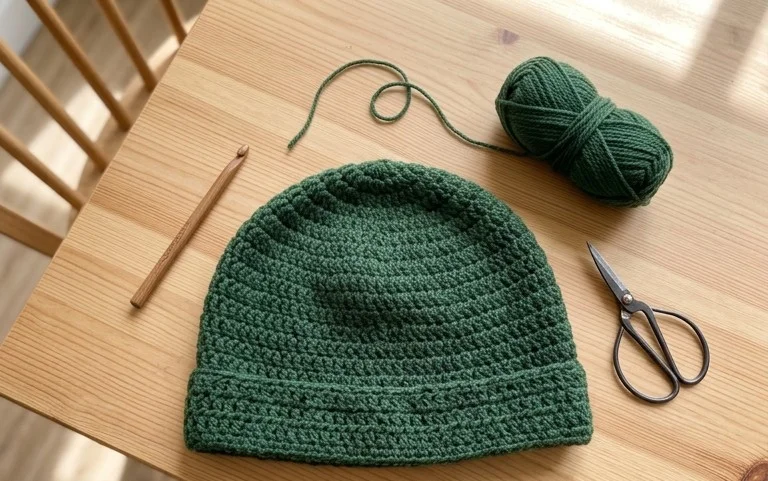
Soft wool against your forehead makes this classic skullcap a cozy companion for brisk morning walks or chilly afternoons spent indoors. This minimalist project features a simple rectangular construction that avoids complex shaping, allowing you to build confidence with basic stitches like single crochet and slip stitches. You will learn how to create a flat fabric that mimics knitting while maintaining the speed of a traditional hook craft. It is a rewarding way to use up leftover yarn from your stash, resulting in a dense, warm accessory that makes a thoughtful, handmade gift for friends and family.
Why You’ll Love This Pattern
This classic crochet beanie works up quickly using basic stitches, making it an ideal project for a relaxing evening of crafting. The structure relies on a simple rectangle worked in rows that is cinched at the top, allowing you to focus on your rhythm rather than complex stitch patterns. Because it uses a medium-weight yarn, the fabric offers a dense, warm texture that keeps its shape well through repeated wear. You can easily adjust the height of the brim to create a snug-fitting skullcap or a trendy slouchy style, providing versatility for different head shapes and personal preferences.
I finished this hat in just one sitting while watching a movie. The instructions were very easy to follow and the final result fits perfectly.
— Sarah, hobbyist crocheter
Pattern Overview & Skill Level
- Skill Level: Beginner
- Approximate Time: 2 to 3 hours
- Construction: Flat panel worked in rows, seamed to create a tube, then cinched at one end
- Finished Dimensions & Sizing: Fits an average adult head circumference of 21–23 inches; flat width is approximately 9 inches
Materials & Supplies Needed
- Yarn: Worsted #4 weight, acrylic or wool blend, approximately 180 yards
- Hook Size: 5.5 mm (US I-9)
- Notions: Tapestry needle, locking stitch marker, scissors
- Safe yarn substitutions: Any soft worsted-weight yarn will work; keep in mind that 100% cotton is heavier and less elastic than acrylic or wool blends, which may result in a slightly larger, less snug fit.
Stitch Guide & Abbreviations (US Terms)
- ch = chain
- st/sts = stitch/stitches
- sl st = slip stitch
- BLO = back loop only (insert hook into the furthest loop of the stitch only)
- hdc = half double crochet
Step-by-Step Pattern Instructions
This hat is worked as a flat rectangle. The rows are worked in the back loop only to create the ribbed, stretchy texture characteristic of classic beanies.
Hat Body
- Row 1: Ch 40. Hdc in 3rd ch from hook and in each ch across. Turn. (38 sts)
- Row 2: Ch 2 (does not count as st), hdc in BLO of each st across. Turn. (38 sts)
- Rows 3–50: Repeat Row 2 until the piece measures approximately 18 inches in length when laid flat.
Seaming and Finishing
- Fold the rectangle in half by bringing the short ends together, ensuring the BLO ridges align.
- Using your tapestry needle and a long tail of yarn, seam the short sides together using a whip stitch or mattress stitch.
- Fasten off, but leave a 12-inch yarn tail.
- Thread the remaining tail through the tapestry needle. Weave the yarn in and out along the top edge of the tube.
- Pull the yarn tail tightly to close the opening at the crown of the hat.
- Secure the center with several tight stitches to ensure it stays closed. Weave in all remaining ends on the inside of the hat.
Care & Washing Instructions
- Hand wash your finished hat in cool water using a mild wool-safe detergent.
- Do not wring out the item; instead, lay it flat on a clean towel and roll the towel to press out excess moisture.
- Reshape the hat while damp and allow it to air dry completely away from direct heat sources.
Pro Tips & Common Mistakes to Avoid
Consistent tension is vital for this pattern. If your stitches are too tight, the hat will be stiff; if they are too loose, the fabric will lose its elasticity. Use a stitch marker at the end of each row to help you identify the final stitch, as beginners often accidentally skip the last hdc of a row, which leads to a slanted edge. When weaving in your ends, run the yarn through the stitches in multiple directions to lock the tail in place so it does not come undone during washing. If you decide to make the hat wider to fit a larger head size, remember that you will need approximately 20% more yarn than specified for the standard adult size.
Frequently Asked Questions
Can I substitute a different weight of yarn for this pattern?
Using a different weight of yarn will change the dimensions significantly. If you use a lighter yarn, you will need to add more starting chains to reach the desired height, and if you use a bulkier yarn, you will need to decrease the starting chain count.
How do I adjust this pattern for a child’s size?
To make the hat smaller, simply reduce the starting number of chains until you reach the desired height, and work fewer rows until the width matches the child’s head circumference measurement.
Is this project suitable for someone who has never crocheted before?
Yes, this is an excellent first project. It teaches you how to maintain consistent row counts and practice the half double crochet stitch, which is a fundamental building block of many intermediate-level patterns.
Am I allowed to sell hats made from this pattern?
You are welcome to sell finished items created from this pattern. I ask that you please credit the design back to this website in your product listings.
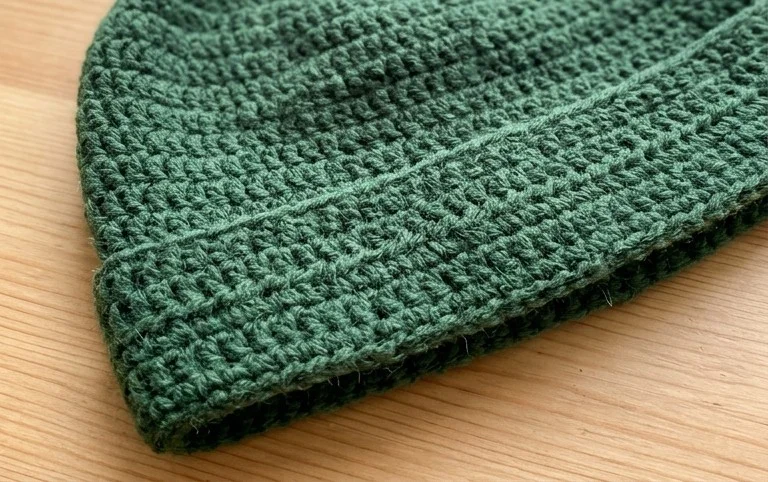
Your finished hat shows how much character a few simple rows can provide when stitched with care. Try working this in a thick variegated wool to add visual depth, or adjust the number of foundation chains to create a smaller version for a child. Please share a photo of your work on your favorite social media platform so others can see your color choices. I encourage you to check back on the blog regularly for more free projects that help you grow your collection of handmade winter accessories.