Easy Crochet Sunflower Coasters: Free Beginner Pattern
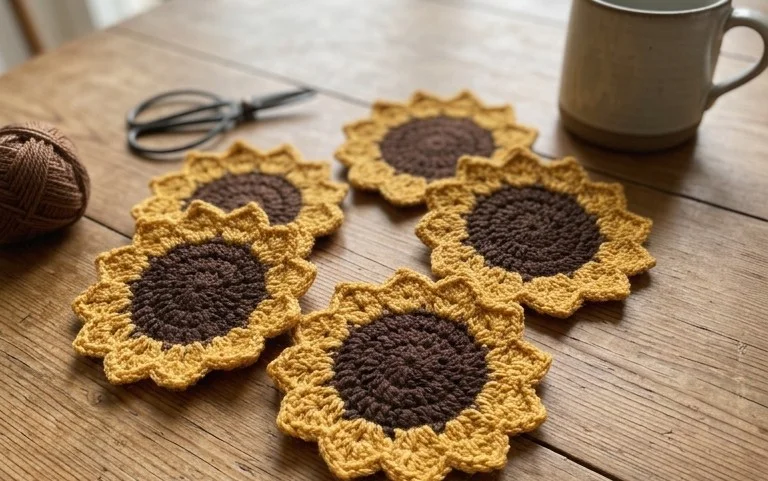
Bright yellow petals against a dark brown center bring a sense of summer to your coffee table even on the coldest winter days. These small items feel dense and sturdy under a heavy mug because of the tight cluster stitches used in the construction. Beginners appreciate this project because it reinforces how to work in circles and manage color changes without leaving long floats of yarn across the back. You will practice the basic slip stitch, chain, and double crochet, which are skills you need for almost every other project you plan to make later on.
Why You’ll Love This Pattern
The Classic Crochet Granny Square is the quintessential project for building fundamental skills while creating a versatile building block for larger items. You work in joined rounds, which allows you to transition between colors easily if you want to use up leftover yarn from your stash. Because the pattern relies on repeating clusters of double crochet stitches, it becomes intuitive quickly, making it a reliable choice for mindful, repetitive stitching while you relax in the evening. Each square works up in under an hour, providing an immediate sense of accomplishment that is perfect for maintaining motivation during long-term projects like blankets or tote bags.
I finally mastered the center joining technique with this guide, and my squares are now perfectly flat and consistent for my first ever scrap blanket.
— Sarah, beginner crocheter
Pattern Overview & Skill Level
- Skill Level: Beginner
- Approximate Time: 30 to 45 minutes per square
- Construction: Worked in joined rounds, starting from the center and expanding outward
- Finished Dimensions: Approximately 5 inches by 5 inches using worsted weight yarn
Materials & Supplies Needed
- Yarn: Worsted weight (#4), 100% cotton or acrylic blend, approximately 20 yards per square.
- Hook Size: 5.0 mm (US H-8).
- Notions: Tapestry needle for weaving in ends, scissors, and a measuring tape.
- Safe Yarn Substitutions: You can use DK weight yarn for a smaller, delicate square, but you will need to increase the number of rounds to reach the same dimensions. Bulky weight yarn will result in a larger, thicker square, which is ideal for washcloths or coasters.
Stitch Guide & Abbreviations (US Terms)
- ch: Chain
- st/sts: Stitch/stitches
- sl st: Slip stitch (insert hook, yarn over, pull through both loops)
- dc: Double crochet (yarn over, insert hook, yarn over, pull up loop, yarn over, pull through two loops, yarn over, pull through remaining two loops)
- Cluster: A group of 3 dc stitches worked into the same space
- sp: Space created by the chain stitches
Step-by-Step Pattern Instructions
Center and Round 1
- Start: Ch 4, sl st to the first ch to form a ring.
- Rnd 1: Ch 3 (counts as first dc), work 2 dc into the center of the ring. Ch 2, *work 3 dc into the center, ch 2. Repeat from * 2 more times. Sl st to the top of the beginning ch-3 to join. (12 sts, 4 ch-2 spaces)
Expanding the Square
- Rnd 2: Sl st into the next dc and into the corner ch-2 space. Ch 3, 2 dc, ch 2, 3 dc in the same corner space. *Ch 1, skip 3 sts, (3 dc, ch 2, 3 dc) in the next corner space. Repeat from * around. Join with a sl st to the top of the ch-3. (24 sts)
- Rnd 3: Sl st into the next dc and into the corner ch-2 space. Ch 3, 2 dc, ch 2, 3 dc in the same corner space. *Ch 1, 3 dc in the next ch-1 space, ch 1, (3 dc, ch 2, 3 dc) in the next corner space. Repeat from * around. Join with a sl st to the top of the ch-3. (36 sts)
Finishing
Once you reach the desired size, fasten off by cutting the yarn and pulling the tail through the final loop. Use a tapestry needle to weave the tail through the back of the stitches, ensuring the end is secure before trimming the excess yarn.
Care & Washing Instructions
- Hand wash your finished items in cool water with a gentle wool or cotton detergent to prevent shrinking.
- Lay the piece flat on a clean towel and reshape it to its original square dimensions while damp.
- Avoid wringing out the item, as this can distort the stitches and stretch the fibers out of shape permanently.
Pro Tips & Common Mistakes to Avoid
Maintain consistent tension by ensuring your yarn feed remains smooth throughout the process. If you find your squares are curling, your stitches are likely too tight; try going up one hook size to relax the fabric. Always place a stitch marker in the first stitch of every round to easily identify where to join. When changing colors, weave your ends in as you go to avoid having dozens of tails to manage at the end of your project.
Frequently Asked Questions
Can I make this square larger than 5 inches?
Yes, simply continue adding rounds by working 3 dc in each side space and (3 dc, ch 2, 3 dc) in each corner space until you reach your preferred size.
How do I change colors between rounds?
At the end of a round, fasten off your current color and pull the new yarn through the corner space before chaining up for the next round.
Is this pattern suitable for complete beginners?
This pattern is ideal for beginners because it uses only basic chains, slip stitches, and double crochets while teaching you how to work in rounds.
Can I sell items made from this pattern?
You are welcome to sell finished items you create, but please ensure you credit the designer and use your own photographs to represent your work.
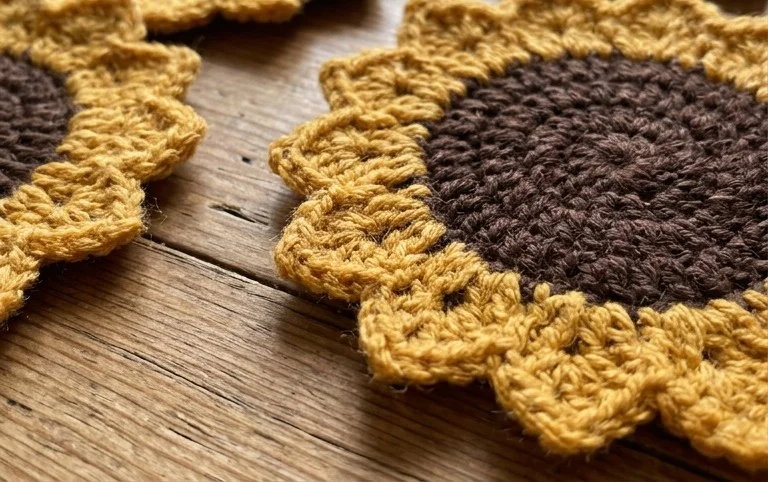
Your finished set adds a splash of nature to your home and keeps surfaces dry from sweating glasses. Try using different shades of variegated yarn for the petals to create a more realistic, organic look on your next batch. I love seeing the colors you choose, so please share a photo of your work on your favorite social media platform. You can find more free patterns and seasonal projects in the main archive on the blog whenever you feel like starting your next small item.